
No products in the cart.
Cakes, Chocolate, Christmas, Dairy Free, Desserts, Easter, Gluten Free, Holidays
Double Whammy Chocolate Cake
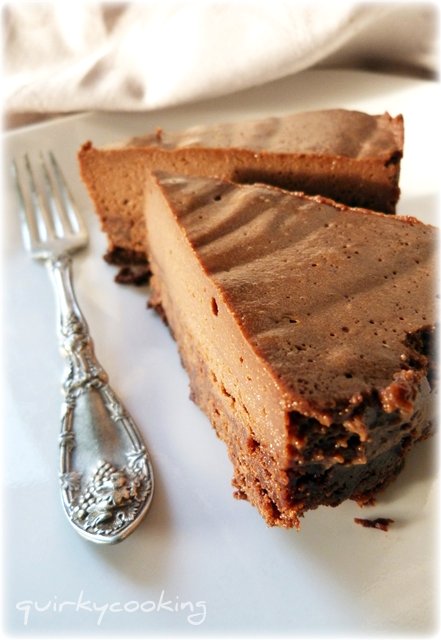
When my big sister was about seventeen, she used to buy ‘Australian Gourmet Traveller’ magazines. She loved to cook (yep, it runs in the family), and one of her favourite recipes was a flourless chocolate fudge cake. We loved that cake. I used to watch her make it, whipping up the egg whites, folding them into the rich chocolate batter, carefully placing it in the oven where it would rise, form a crispy crust, then the crust would crack and slightly crumble to reveal a dark, fudgy interior. She’d dust it with cocoa and we’d savour each bite. For some reason I never thought to ask her for the recipe until a couple of months ago when she came for a visit. Unfortunately, the recipe was long gone. But when she went home she sent me a few versions that are similar. One of them had a buttery, chocolate concoction on top that sounded amazing – but of course it had lots of sugar and dairy in the recipe. So I decided to come up with my own version, and after many trials and errors (which were happily eaten by my family and friends), here it is, the long-awaited… [drum roll…] Double Whammy Chocolate Cake recipe!
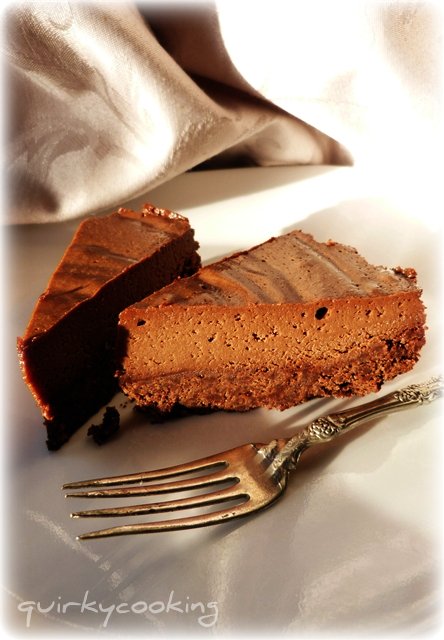
This is a very rich, decadent cake that has two layers – a flourless chocolate cake for the base, and a chocolate mousse-ish layer on top. A delicious ‘double whammy’ of chocolate. The method for each layer is very similar (and the ingredients are mostly the same) – but the base is baked, and the top is thickened with agar agar. Because of all the eggs (eight altogether!), dark chocolate and Rapadura, it’s not something you’d make every day – but it’s perfect for special occasions. It’s similar to a chocolate cheesecake, except it’s dairy free, gluten free, grain free and nut free… which is why I’m so excited about it!
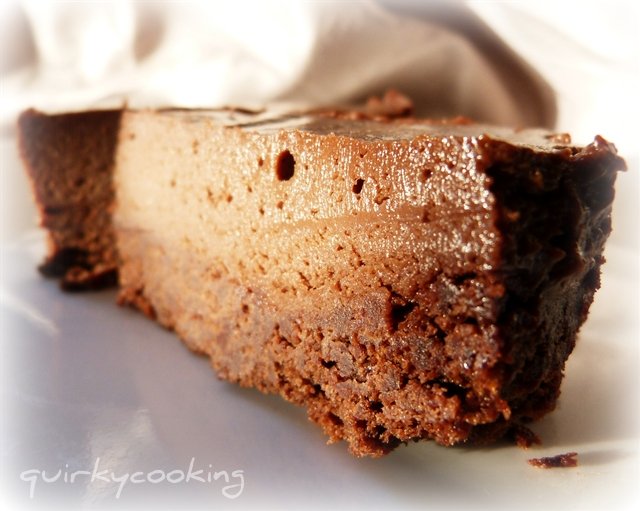
The two layers
I love flourless cakes made with ground almonds or hazelnuts, but a lot of people can’t have nuts. And if you can’t have gluten or dairy either, eating cake becomes a very rare pastime. Which I think is very sad. So if you are one of those people, I hope this recipe makes you very happy. (And I’m pretty sure that even if you can have gluten, dairy and nuts, this cake will still make you very happy!) Enjoy.
Note: You can find fine sea salt and Dutch cocoa powder for this recipe in my online store!
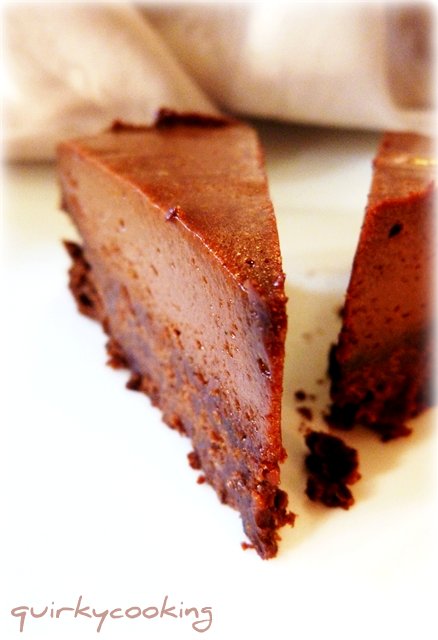
You really only need a thin sliver of this cake – it’s very rich!

Double Whammy Chocolate Cake
2014-07-10 09:15:24
Ingredients
- 200g Rapadura
- 240g dark, dairy free chocolate (eg. homemade chocolate or 70% cocoa Lindt chocolate)
- 120g of the ground chocolate
- 120g coconut oil (cold pressed)
- 100g of the ground Rapadura
- 1 Tblspn organic cocoa (or cacao) powder
- 1/4 tsp green stevia powder
- 4 egg yolks
- 4 egg whites
- a pinch of cream of tartar
- 120g ground chocolate
- 120g coconut oil (cold pressed)
- 100g ground Rapadura
- 1 Tblspn organic cocoa (or cacao) powder
- 1/4 tsp green stevia powder
- 4 egg yolks
- 2 heaped teaspoons agar agar
- 1/3 cup room temp water
- 4 egg whites
- a pinch of cream of tartar
Instructions
- Grind Rapadura on speed 9 for 30 seconds in a very dry bowl. Tip into a small bowl and set aside.
- Break chocolate in pieces, weigh into Thermomix bowl and grind on speed 8 for 10 seconds. Tip into another small bowl and set aside.
- Weigh ground chocolate, coconut oil into Thermomix bowl and cook at 50 degrees for 3 minutes, speed 3. Allow mixture to cool to 37 degrees.
- Add Rapadura, cocoa and stevia to the chocolate mixture and begin mixing on speed 5. While mixing, separate 4 eggs, adding yolks to mixture through the hole in the lid as you go. Turn speed off once you get to 5 minutes.
- Scrape the chocolate mixture into a large mixing bowl, set it aside, and wash out the Thermomix bowl really well.
- Insert the butterfly into the dry, clean bowl, and whisk the egg whites and cream of tartar on speed 4 for 4 minutes, until stiff.
- Fold the egg whites gently into the chocolate mixture in the mixing bowl, using a spatula, until just combined.
- Pour batter into lined cake tin and bake for approximately 1 hour at 150 degrees C, or until a knife inserted in center of cake comes out clean.
- Set cake aside to cool while you make the topping. Start off with the same method as you used with the cake - melt together the remaining chocolate and coconut oil at 50 degrees for 3 minutes on speed 3.
- Add remaining Rapadura, cocoa and stevia to the chocolate mixture and begin mixing on speed 5. While mixing, separate 4 eggs, adding yolks to mixture through the hole in the lid as you go. Turn speed off once you get to 5 minutes.
- Sprinkle agar agar over water in a measuring cup/jug and mix in until it dissolves. Add to the chocolate mixture and mix on speed 5 for a few seconds until well mixed.
- Scrape the chocolate mixture into a large mixing bowl, set it aside, and wash out the Thermomix bowl really well.
- Insert the butterfly into the Thermomix bowl and whisk the egg whites and cream of tartar on speed 4 for 4 minutes, until stiff.
- Fold the egg whites gently into the chocolate mixture in the mixing bowl, using a spatula, until combined. Pour topping mixture onto the cake in the springform tin. It doesn't seem to matter if the cake's not completely cool, as the topping is quite thick and will set anyway.
- Cover the cake and set it carefully in the fridge to set overnight. Or if you're impatient, place it in the freezer for a couple of hours, then the fridge. It should set so that the topping is firm and can be sliced without losing it's shape.
Quirky Cooking https://quirkycooking.com.au/


Green stevia powder


Agar agar powder
The chocolate mixture will become thick and creamy, kind of like a pudding consistency – like this:


This cake will keep for up to a week in the fridge, so it’s great to make ahead if you’re taking it to a party. Or you could just make it for yourself and eat a little tiny slice every day for days on end… Just freeze the individually wrapped slices and they’ll last for ages. And they taste great straight from the freezer too – like an ice cream cake!
Sigh. Mine’s all gone now, and I’ve finished testing this recipe. I need to think of another excuse to make it now…
Tips & Variations:
* It’s very handy to have two Thermomix bowls when making this recipe! You can have one bowl for the egg whites, one for the chocolate mixture, and it’s a lot quicker and easier. But if you only have one bowl, that’s okay – this cake is still worth the little bit of extra work.
* Room temperature egg whites whip up the best, so leave the eggs out of the fridge for a while before you make this.
* I buy my coconut oil in bulk either through my co-op or on the internet. It’s a lot cheaper that way. If you’d rather, you can use butter instead of the coconut oil.
* The green stevia is added to cut down on the amount of Rapadura used. If you want to you can increase the Rapadura to 250g and leave out the stevia. Or you could cut the Rapadura down further and use more stevia – eg. 80g Rapadura + 1/2 tsp stevia for the base, same for top. If you can’t find green stevia, you can order it online here – it tastes better than the white stevia powder or stevia liquid, and is just the dehydrated leaves, ground up.

Hi Jo
Is there another substitute for agar agar? If not where do you think I might be able to buy this?
Also can I use coconut sugar instead of rapadura and if so how much?
Yes use gelatine instead of agar, and coconut sugar is fine!